Author Topic: April 1970 Dearborn Car WheelWells  (Read 5637 times)

Offline 70boss2wv

  • Newbie
  • *
  • Posts: 7
April 1970 Dearborn Car WheelWells
« on: September 10, 2014, 10:06:19 PM »
Just joined the site.
Looks like a lot of excellent info here.

I've got a 70 dearborn late april. (U paint)

It was army green ( no metallic ) on the untouched parts of the floor.

Are there any pics of the wheel wells for this time frame?

Offline J_Speegle

  • Administrator
  • Hero Member
  • *****
  • Posts: 24221
Re: April 1970 Dearborn Car WheelWells
« Reply #1 on: September 12, 2014, 10:52:09 PM »
Welcome to the site - hopw you find the information posted here useful in your restoration efforts


Are you looking for front or rear wheelwell pictures from that time period?
Jeff Speegle

Anything worth doing is worth doing concours ;)

Offline 70boss2wv

  • Newbie
  • *
  • Posts: 7
Re: April 1970 Dearborn Car WheelWells
« Reply #2 on: September 22, 2014, 10:25:50 PM »
Both would be useful.

Offline J_Speegle

  • Administrator
  • Hero Member
  • *****
  • Posts: 24221
Re: April 1970 Dearborn Car WheelWells
« Reply #3 on: September 23, 2014, 04:35:31 PM »
OK - Looks like your car may have been built around the same time as a couple of other cars I have pictures of So we'll focus there


Rear wheel wells would have had the sound deadener applied before exterior paint and covered much but not all of the wheel tubs. As shown in the picture below the worker tried to stay away from the outer lip likely because they didn't want to cause a mess on the lib that they would then have to clean up.


 Applied from below the car's body, upward and in the product did not stop at the edge of the wheelwell (towards the inner surfaces) but overspray and direct application also ended up on the frame rail and small floor section directly behind the wheelwell


Since the sound deaderner remained plyable and was exposed to allot of abuse over the years most of the time most if not all of the exterior color is gone by now leading many over the years to believe that the sound deadener was applied last. Over the years we've been able to document more and more unrestored cars with some paint left as seen in the pictures above and below


« Last Edit: September 23, 2014, 04:42:49 PM by J_Speegle »
Jeff Speegle

Anything worth doing is worth doing concours ;)

Offline J_Speegle

  • Administrator
  • Hero Member
  • *****
  • Posts: 24221
Re: April 1970 Dearborn Car WheelWells
« Reply #4 on: September 23, 2014, 04:44:35 PM »
Front wheel wells from your cars period are a bit unusual it seem from other time periods where workers (before sound deadener was applied) would leave much of the undercarriage or red oxide as well as the forward spraying of body color exposed in the front wheel wells.

On cars like yours it appears (from examples) that the painter at that station choose to black out just about all the details from where the rear splash shield would attach to the cowl/bulk head to the radiator support with the engine compartment black. They likely didn't apply allot of black in the interior of the shock tower area and at least two of the three surfaces inside was likely thin.  No real reason to take the effort to go back over that area.


Of course after the car was assembled the sound deadener was applied over the inner fender panels and bottom of the fenders trying to make sure to also seal the splash shields to the inside surface of the fenders. Dearborn can have examples of a medium to heavy application of sound deadener in the front wheel wells in this case I'm finding a medium on the examples from your cars time period


Hope this helps
Jeff Speegle

Anything worth doing is worth doing concours ;)

Offline 70boss2wv

  • Newbie
  • *
  • Posts: 7
Re: April 1970 Dearborn Car WheelWells
« Reply #5 on: September 28, 2014, 11:50:01 AM »
That's great information.
My car didn't have an original surface left. It was all por15'd.  When I took that off all was lost.
Here's are some pics of where I am now.
I was in the process of detailing the chassis, and planed to mask that off when the top side is done.
I realized I skipped the sound deadening before the body color over-spray.
So, now my plan is
1. put on the sound deadening
2.  redo the body colored over-spray (grabber orange)
3. add black out to the front wheel well, and spray the rocker pinch weld.
Does that make sense?
Any chance you could indicate on the pics where you think the sound deadening should go?
Also, do you have an recommendations for what to use for sound deadening material?
Thanks for your help so far.

Offline J_Speegle

  • Administrator
  • Hero Member
  • *****
  • Posts: 24221
Re: April 1970 Dearborn Car WheelWells
« Reply #6 on: September 28, 2014, 07:22:14 PM »
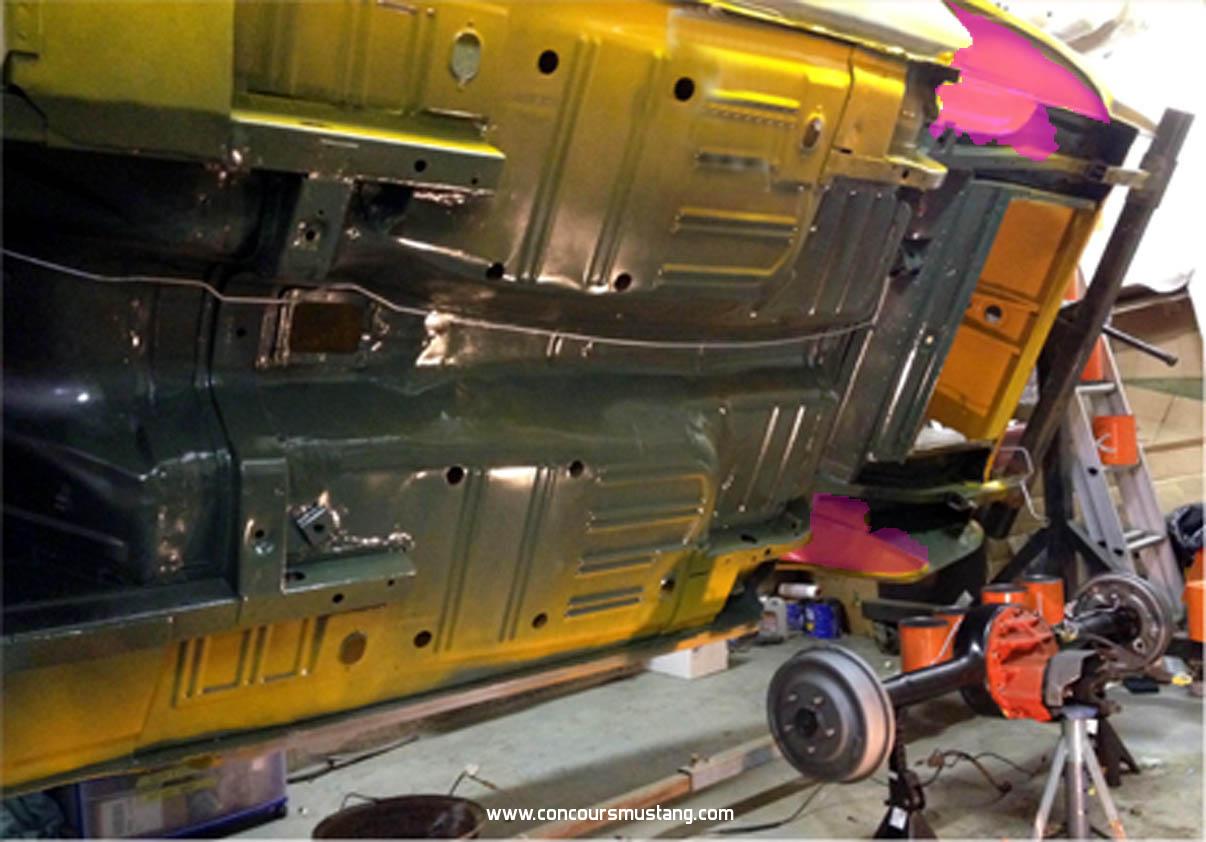
First thanks for the pictures - lets me know where your currently at

Let me try this - here is my recommendation if I offer a step that you already have completed just skip over it - some of the details (like the rear wheelwells are not clear from the angle you provided.

Lets doe firewall rearward and firewall forward in no particular order

Rearward.

1- Spray the rear wheelwells with sound deadener - heavy application as shown above continuing onto the frame rail surface and floor between the frame and wheel well.


2- Respray your exterior color over this newly applied  material and if you choose add more down the length of the car inward if you choose to blend it in that way. Did notice you left off the 10 dolly marks what would have been visible originally

3- Soft tape or mask the bottom edge of the rocker panel and rear section of quarter panel approx 1/2" from the pinch weld and spray black out onto the rocker and quarter panel allowing the black overspray to flow onto the floors, front frame rails and other surfaces directly behind and slightly above the pinch weld. Its not unusual for the black to extend slightly into the rear wheelwell as the painter moved the gun to the end then shout off the flow, only to begin again at the other end of the wheel wells. Application would also produce a shadow approx 2" wide behind the pinch weld. Forgive me for my quickly thrown together illustrations :(


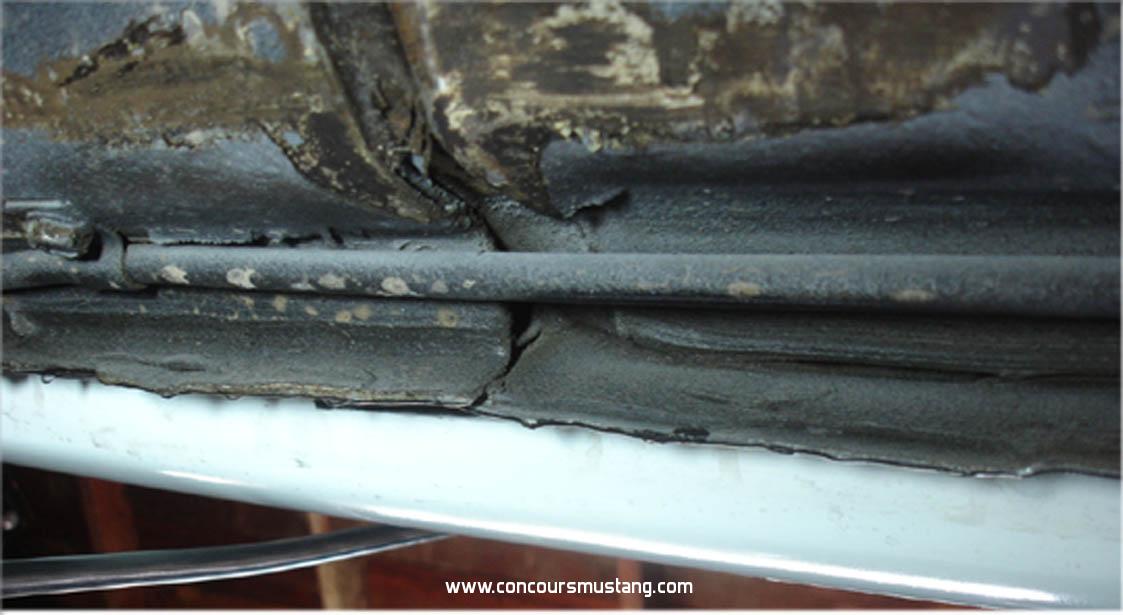
4- Using a black flexible smooth chalking chalk heavily the  inner seat belt mounting brackets and run a brushed ribbon of the product along the rocker to floor seam as well as the bottom edge of the trunk drop on both sides


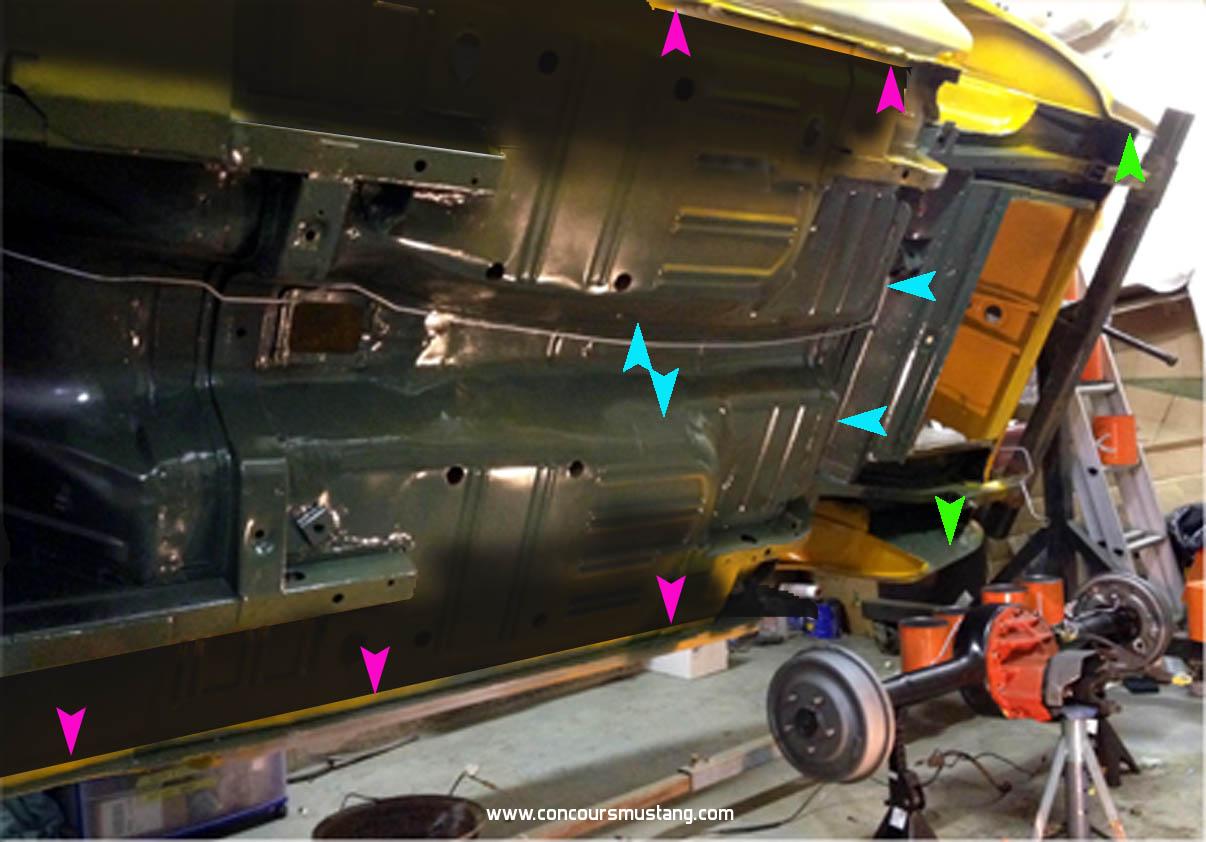
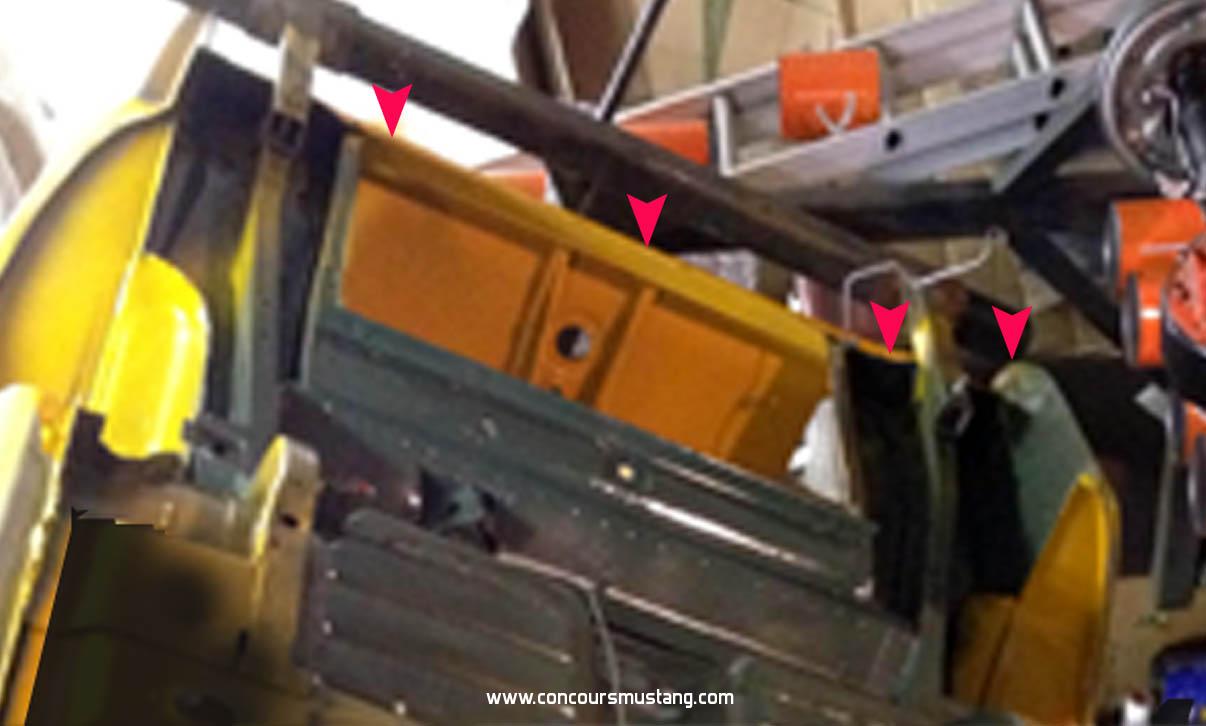
Issues - Noticed that you shot the car without the rear valance in place or the rear bumper guard brackets in place. the amount of overspray on the trunk drops we see in you picture would be impossible (along with what looks like orange on the rear cross member) if the valance was there. That will need to be corrected somehow.


Front wheel wells  Next ;)
Jeff Speegle

Anything worth doing is worth doing concours ;)

Offline 70boss2wv

  • Newbie
  • *
  • Posts: 7
Re: April 1970 Dearborn Car WheelWells
« Reply #7 on: September 29, 2014, 03:21:30 PM »
Jeff,
Thanks again.

When you say "rear bumper guard brackets".
Are these the brackets that the bumper attaches to?

Len

Offline J_Speegle

  • Administrator
  • Hero Member
  • *****
  • Posts: 24221
Re: April 1970 Dearborn Car WheelWells
« Reply #8 on: September 29, 2014, 07:40:41 PM »
Jeff,
Thanks again.

When you say "rear bumper guard brackets".
Are these the brackets that the bumper attaches to?

Len forgive me please - got confused between year I was describing - the bumper guard brackets are a 65-68 thing not something is should ahve mentioned for your car since its a 70. Guess that is my mistake for the day, week, moment :(

Still need to address that paint back there
Jeff Speegle

Anything worth doing is worth doing concours ;)

Offline J_Speegle

  • Administrator
  • Hero Member
  • *****
  • Posts: 24221
Re: April 1970 Dearborn Car WheelWells
« Reply #9 on: September 29, 2014, 08:09:34 PM »
Front wheel wells recommendation for this April 70 Dearborn

Again - if your viewing this remember that its very likely that these details do NOT apply to your car or how it was originally built. As mentioned earlier this period of time and assembly plant is not typical of other periods durign 70 production

1- Front wheel well currently


2- Need to add the seam sealer along the rear inner fender panels to firewall and front frame rail to firewall and toque box. This would have been originally applied before body color but in this case this layer will be covered with black and then sound deadener unlike other periods of time


3- Once sealer is dried apply a coat of black over the inner fender panels, inner shock tower and firewall, frame and face of torque box from where the splash shield will be applied


4- Sound deadener (not easy to show a 3d detail in a 2 d picture) is applied after the fender, suspension, splash shield and all other parts are installed on the car - except the wheel and tire. The amount and areas of application can vary allot. What I've illustrated (or tried to) is a middle of the road application. Thre sound deadener could and often did extend onto the bottom surface of the fender and or the coil spring cover


Hope this helps
Jeff Speegle

Anything worth doing is worth doing concours ;)

Offline 70boss2wv

  • Newbie
  • *
  • Posts: 7
Re: April 1970 Dearborn Car WheelWells
« Reply #10 on: October 02, 2014, 10:25:21 PM »
Jeff,
That's fantastic information.
I have some redoing to do.
As for the sound deaden-er:
What do you think of "lizard skin" sold by Eastwood, and Jegs?
Or Spray dead, or are there spray cans by 3m that give the proper effect?
How much do you think it would take for a non Mach 1 car?
Thanks again.
Len
« Last Edit: October 02, 2014, 10:27:32 PM by 70boss2wv »

Offline J_Speegle

  • Administrator
  • Hero Member
  • *****
  • Posts: 24221
Re: April 1970 Dearborn Car WheelWells
« Reply #11 on: October 03, 2014, 10:47:46 PM »
What do you think of "lizard skin" sold by Eastwood, and Jegs?

Looks too much like trunk bed liner to me and too solid once on


Or Spray dead, or are there spray cans by 3m that give the proper effect?

Never seen Spray dead used. And rattle cans will not get you the thickness or texture your looking for. Too many of the products - especially the rattle cans- are too runny and multiple layers dissolve the earlier layers making it impossible for me at least, to gain any build up the thickness or provide body if I could get curtains to develop and sag


How much do you think it would take for a non Mach 1 car?

My guess for front and rear wheel wells along with trunk sound deadener as well as seam seal usage would be a gallon of product if I was doing it. As you mentioned this is without any floor pan (70 Mach I/ Grande) spraying

Maybe someone that uses a chalking tube product has an estimate of what they go through.  Think a pair of front wheel wells  took six tubes of the Lord Fusion stuff for a local 67 but it was a bare minimal application of sound deadener and the firewall (in the wheelwells) seams were gone with another product
Jeff Speegle

Anything worth doing is worth doing concours ;)

Offline 70boss2wv

  • Newbie
  • *
  • Posts: 7
Re: April 1970 Dearborn Car WheelWells
« Reply #12 on: October 05, 2014, 10:49:21 PM »
Thanks again.

Going back to the dolly marks.
What diameter should they be?

Offline J_Speegle

  • Administrator
  • Hero Member
  • *****
  • Posts: 24221
Re: April 1970 Dearborn Car WheelWells
« Reply #13 on: October 06, 2014, 12:00:38 AM »
Going back to the dolly marks.
What diameter should they be?

Differs slightly sometimes even on the same vehicle as maintenance crews often had to repair the dolly's and the stands. Sometimes the replacement was slightly larger or smaller.  Often a depression is left on the upper points (interior of the car or trunk) in the sheet metal. These can be measure for an accurate idea of what was used, at least in some locations, on your car. IF not I've found 1 3/4" diameter is a good average or same as original on some cars
Jeff Speegle

Anything worth doing is worth doing concours ;)