Author Topic: Interior Door Paint Details - 66 SJ  (Read 1997 times)

Offline rkolenda

  • Newbie
  • *
  • Posts: 7
Interior Door Paint Details - 66 SJ
« on: April 11, 2014, 12:56:54 PM »
I have been searching the site for any views of  how the factory transitioned from the interior color to the body color on the door upper area.I found the link showing the lower detail but I can,t find the upper.This would be a66 gt350 San Jose built car. Does anyone have a photo of this .Thanks ,Bob
« Last Edit: January 23, 2022, 05:12:04 PM by J_Speegle »

Offline jwc66k

  • Hero Member
  • *****
  • Posts: 7136
Re: Interior paint break for upper door area.
« Reply #1 on: April 11, 2014, 02:30:49 PM »
Bob,
  The "transition" is covered by the weather strip.
Jim
 
I promise to be politically correct in all my posts to keep the BBBB from vociferating.

Offline J_Speegle

  • Administrator
  • Hero Member
  • *****
  • Posts: 24232
Re: Interior paint break for upper door area.
« Reply #2 on: April 11, 2014, 06:55:05 PM »
Note to others:  65 San Jose pattern differs slightly ;)

On the leading edge it follows the edge that the weatherstrip covers except in some examples where the mask continued straight and the paint edge was not covered by the weatherstrip

At the rear edge it follows up the weatherstrip edge until approx the last inch as shown in the picture below

Figured I would show all the areas and edges covered by the mask. Iinterior paint was applied first than masked off before the exterior color was applied


Interior door face


Top Edge at window opening


Forward facing edge


Bottom edge


Rear face at top


Jeff Speegle

Anything worth doing is worth doing concours ;)

Offline rkolenda

  • Newbie
  • *
  • Posts: 7
Re: Interior paint break for upper door area.
« Reply #3 on: April 14, 2014, 09:47:32 AM »
Thank you Jeff that is exactly what I needed. I have seen this detail finished differently on many restored cars and I did not know what is correct.Thanks much,Bob

Offline J_Speegle

  • Administrator
  • Hero Member
  • *****
  • Posts: 24232
Re: Interior paint break for upper door area.
« Reply #4 on: April 14, 2014, 04:36:12 PM »
Thank you Jeff that is exactly what I needed. I have seen this detail finished differently on many restored cars and I did not know what is correct.Thanks much,Bob

Can't trust those "restored" cars since no matter what is done at best its only someones interpretation of what they found or remember along with their ability to reproduce. Nothing wrong if that is all you have but as long as we have original examples I think that is a better choice.

In any case the sites and posts like this are having an impact. Last year at SAAC in the Concours class for 65-66 not a single car received any deduction for getting these details incorrect. Something that has not been the case in the past.
Jeff Speegle

Anything worth doing is worth doing concours ;)

Offline J_Speegle

  • Administrator
  • Hero Member
  • *****
  • Posts: 24232
Re: Interior Door Paint Details - 66 SJ
« Reply #5 on: January 23, 2022, 05:15:16 PM »
Just posted a group pf pictures in response to the same basic question about interior door paint details. Though I should post some of those pictures to this tread while I had them handy. Might be a little duplication but I don't think that will hurt the thread


As mentioned above the interior paint was applied first. For 65-66 this means the doors, dash and A pillars. These areas were then masked off either free hand or some form of precut mask that was tapped in place. Because of this you can get areas where the paint (exterior color) could blow under if not tapped or the mask lift for a section and produced a softer paint edge


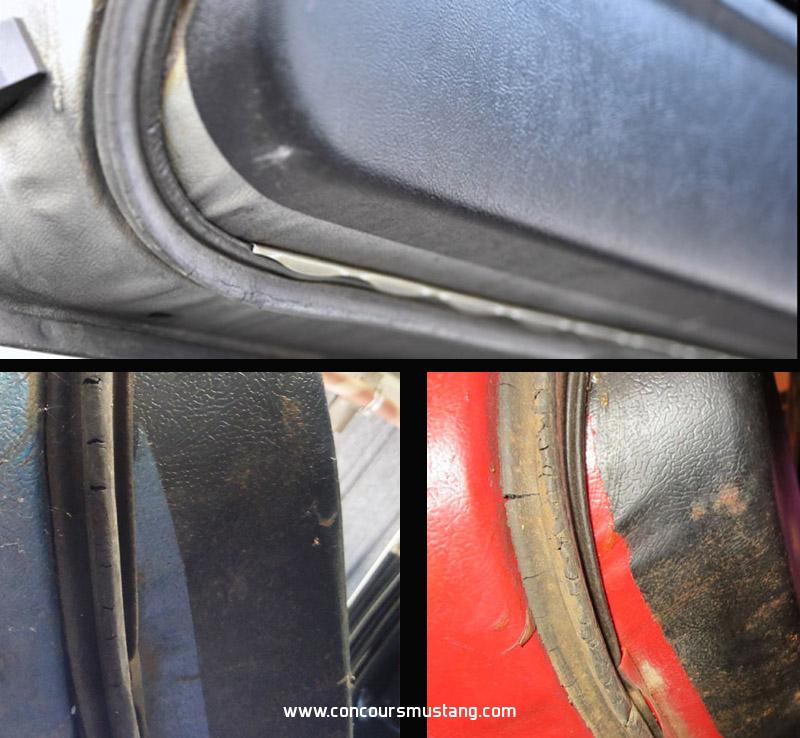
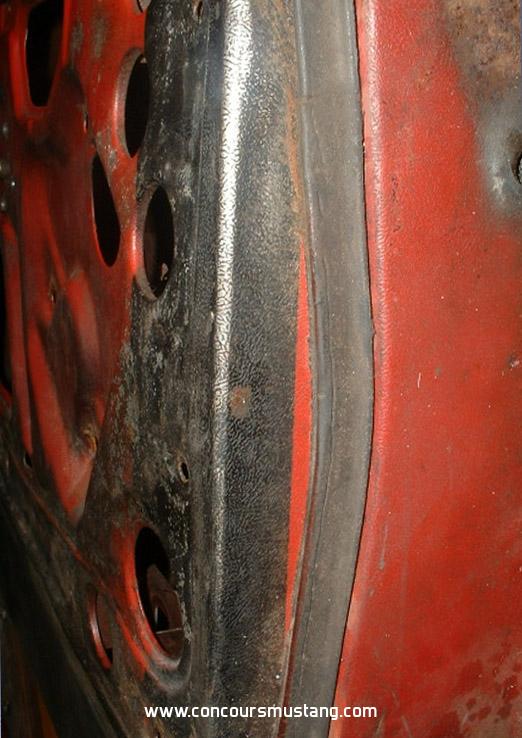
At the rear most of the edge is located where the weather strip would be attached except at the very  top at the rear where the paint extended further as shown


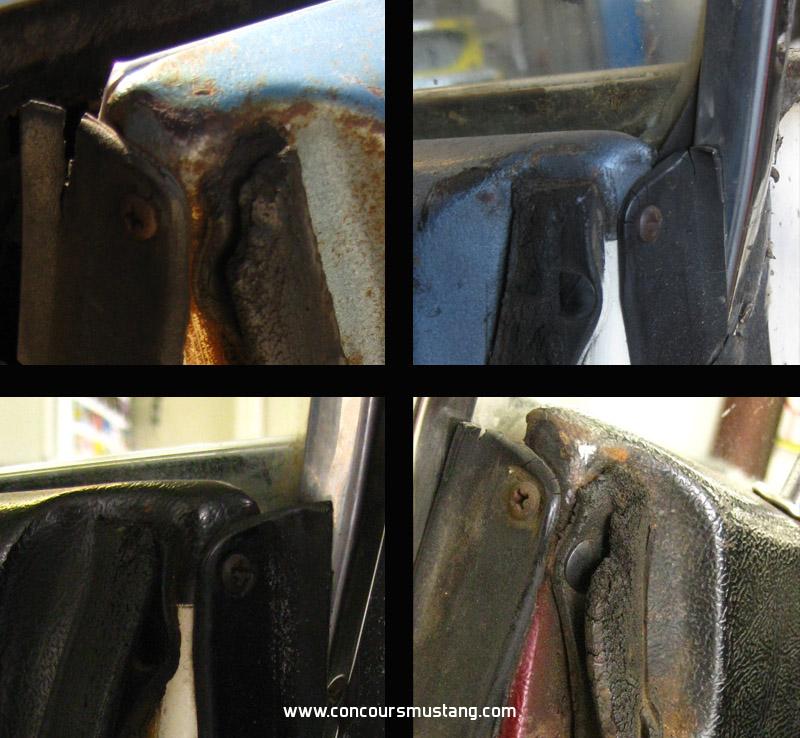
And at the bottom of the rear edge the mask/tape pulled in and away from the weather strip impression in the door edge.


This could be done neatly or a bit messy with ends and pieces of tape in the say as shown


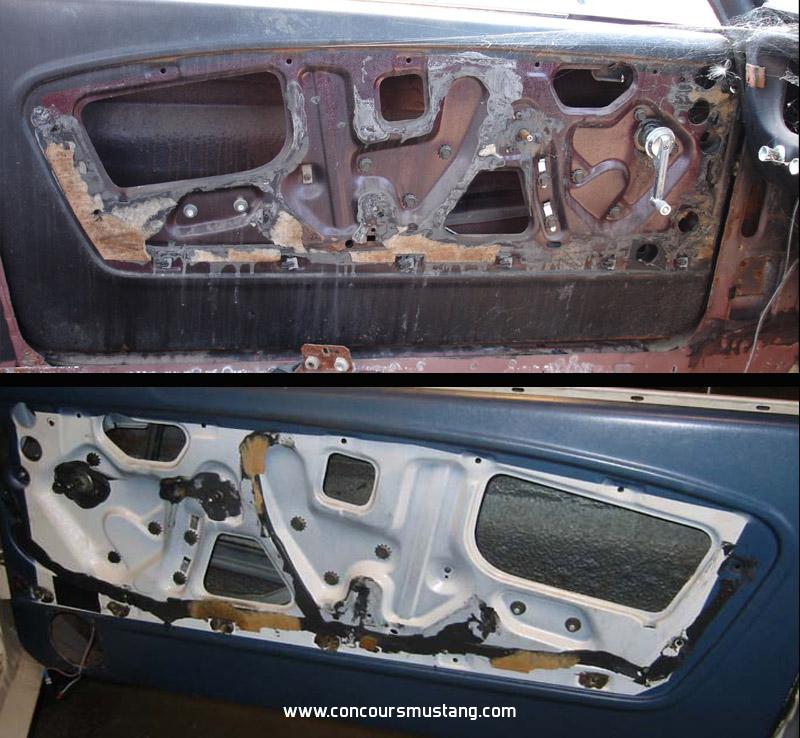
As we look at the bottom of the door we find that the mask did not follow the weather strip impression and track area. Instead we often find a straight edge produced from the taping of the mask or in some cases a less than perfectly straight line.  Also painters, either interior or exterior ones, didn't always put the effort in on a particular car to bend over far enough to apply allot or in some case almost any paint to the bottom edge making the paint lines difficult to see. On other examples a good coat of paint was applied as seen in the pictures below


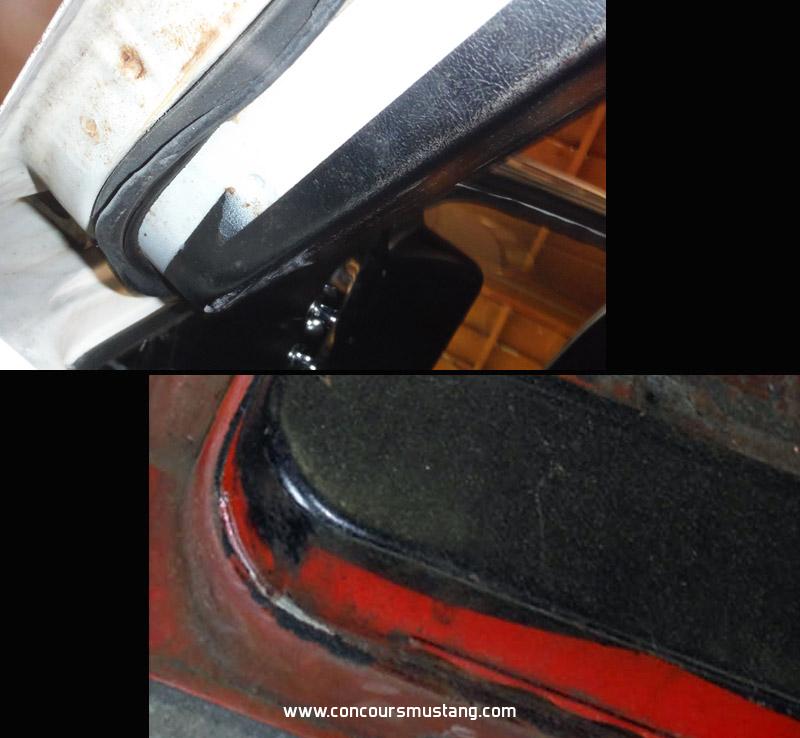
Not much paint for interior or exterior on the bottom of the door on the left while on the right a nice coat of both on this example


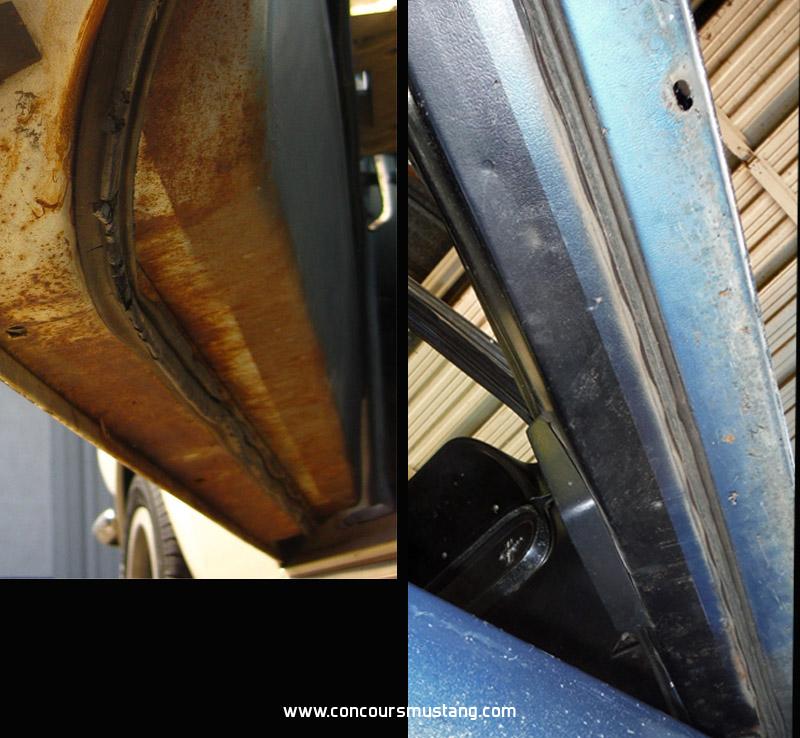
More difficult to get pictures of the front edge of the door but here is an example. After the transition at the forward bottom corner like at the rear the paint line travels to the weather strip impression then takes a straight line to the upper weather strip impression and into the window opening from there


Though it may not matter since its an unseen detail, for what ever reason San Jose workers choose not to mack off the center of the door surfaces where the door panel would eventually be attached


Hope this helps others
Jeff Speegle

Anything worth doing is worth doing concours ;)

Offline J_Speegle

  • Administrator
  • Hero Member
  • *****
  • Posts: 24232
Re: Interior Door Paint Details - 66 SJ
« Reply #6 on: February 01, 2023, 07:47:24 PM »
Posted some pictures in the 66 Shelby section that I felt would be a good fit for this thread and help illustrate how the dash and A pillars were painted and protected during paint process.

As a refresher after the primer coats (red and grey) to the exterior of the car the interior paint was applied to the interior door surfaces as well as the dash and A pillars. These surfaces, well most of them, were masked to protect those areas from the exterior paint coat. In the pictures you can see along the leading edge of the A pillars and the windshield openings where the mask or tape wrapped around the edge.

We can also see where the mask came down the A pillar onto a section of the top of the dash on both sides.  We can also see that there was another mask applied over the radio speaker and defroster openings.


Example #1 - Blue interior and white exterior


Example #2 (top) - Black interior and blue exterior
Example #3 (lower) - Parchment interior and dark green exterior


Jeff Speegle

Anything worth doing is worth doing concours ;)