Just as a reminder to those watching or reading in the future, your car is 9F02G1865xx and was completed on 4/30/69.
Since regular production only started a few weeks prior to this date it appears from examples some practices may have been different from those that followed in later months so want to at least remind others that the information provided is focusing on your production period as best we can at this point.
Choice or redoing your whole trunk (stripping down and replacing everything) or repairing sealers and sound deadeners then repainting is one you'll have to decide since your the person that knows the rest of the plans for the vehicle and what would be a better match for your end goal. If you don't have rust concerns of it growing under the factory products then repairing, feathering paint edges and recoating may be the best choice sine you'll never get the replacement seam sealers and sound deadener exactly like it was originally. On the other hand this may take more effort. Just a choice.
Lets look at some examples from the same time period. Of course you would first have the exterior color applied to the trunk during the paint process. This would have been applied over the seam sealer (both spray on and that applied from a chalking gun and worked) as well as sound deadener. No real effort was to paint anything that would not be seen by the customer standing at the rear of the car with trunk lid open, within reason, so bottoms of quarter panels, areas inward and above wheel houses, up under the rear window edge and other corners in the trunk often got missed with direct application of body color
As we know after the body color was applied areas of the exterior and trunk were sprayed with a low gloss black as part of the Boss 302 package. This included the panel in front of and between it and the rear window as well as the taillight panel as well as the bottom of the trunk lid. Just focusing on the trunk and the opening at this point.
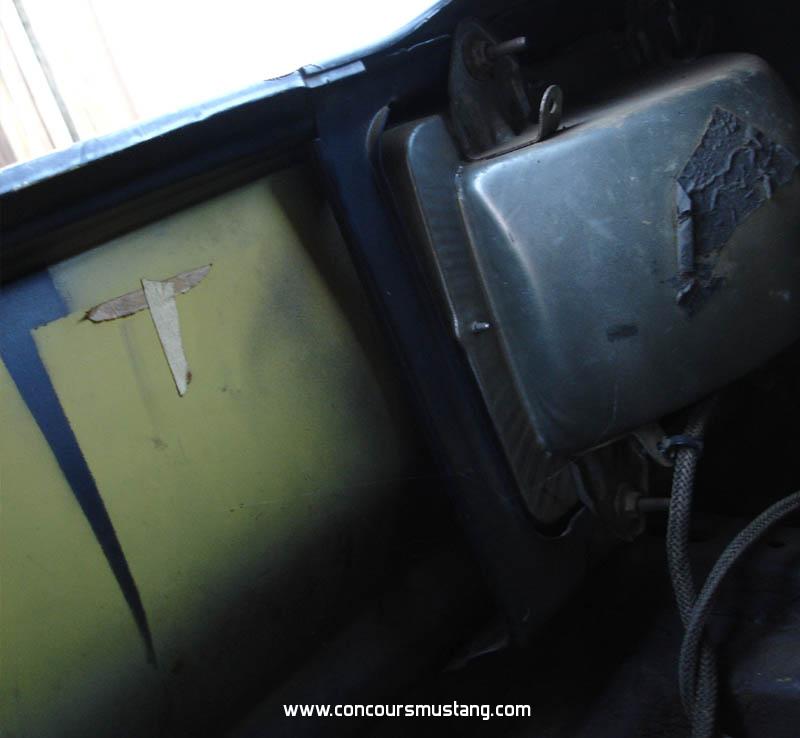
The ends, as they progressed into the trunk opening were tapped off at an angle as shown in the pictures below.
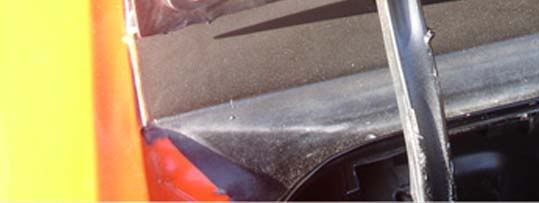

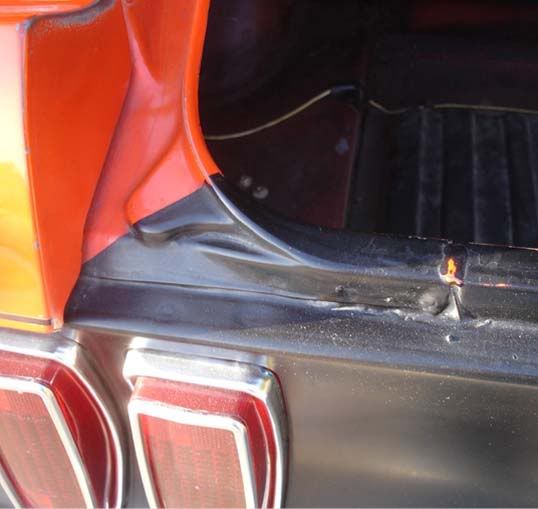

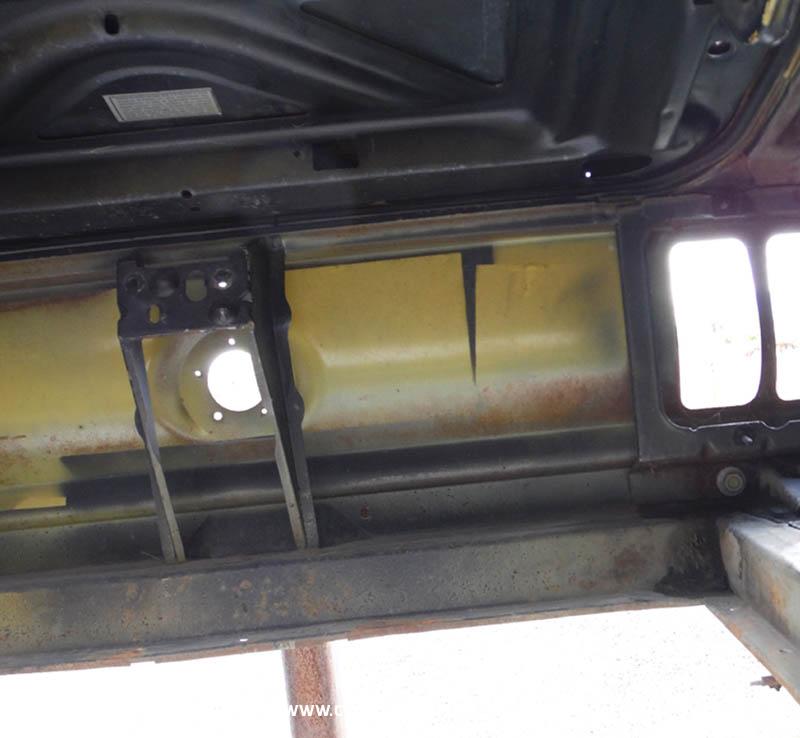
At the forward part of the opening there appears to have been no effort to mask off the rest of the trunk so the worker spraying covered the trunk hinges, their mounting or attaching brackets and over spray continued down onto the surround surfaces. Amount would depend on the worker, angle of application and other factors. Here is an example. The seam sealer sprayed around the wheel house and trap door surround appears to have been repaired or recoated. You can see in the upper part of the pictures (just happens to be the same color as your car

the black over blue described above.
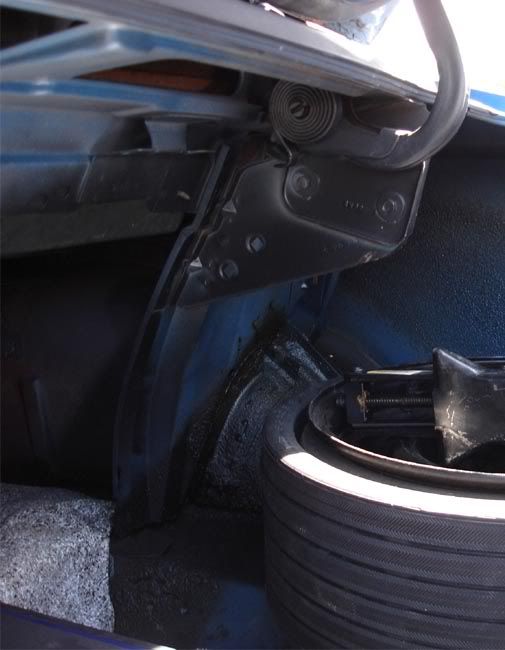
Now the handling of the back side (trunk side) of the taillight panel appears on an example built on the same or with-in a day or so of your car is what is unusual and may be part of an early effort to control overspray and paint spray during this whole process. As we think of the process we have the painter painting the exterior trunk panels as well as these trunk (bottom of lid, hinges, and corners) and the paint and overspray would have wanted to pass through the taillight and gas filler openings. In the example below it appears that the guys on the line attempted to restrict the passing of the paint from one area to the other by masking off the rear taillight panel on the inside behind the trunk latch and taillight bracket with multiple sheets of paper. Your car may have been similar as it appears in at least one of your pictures black paint on the taillight mounting bracket but no black behind it on the taillight panel.

On later built cars I have different patterns likely due to different practices in masking and attempts to control or limit overspray
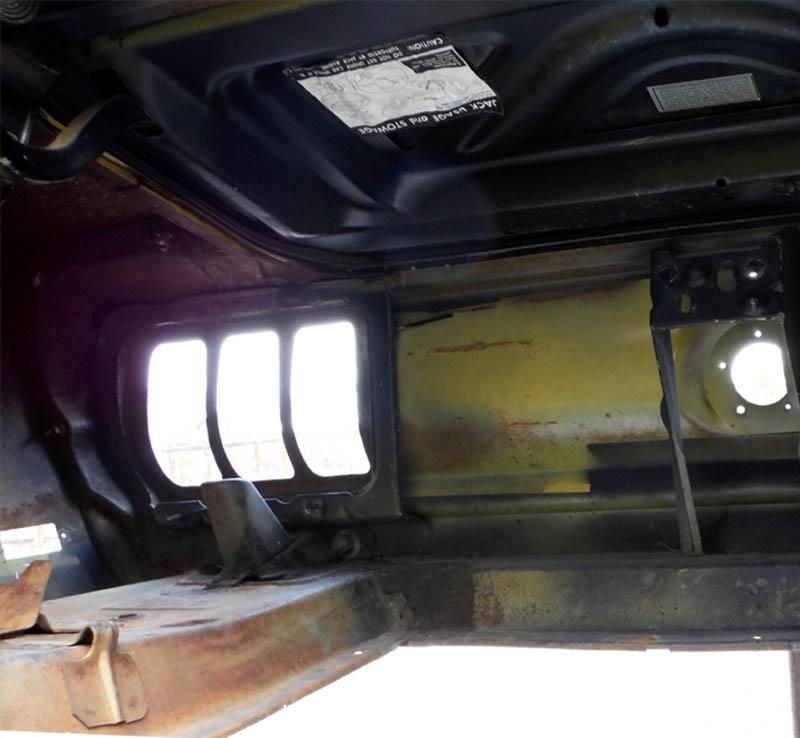
Now on the quarter panels efforts were made to keep the black within the trunk area by placing small masks over the rear side marker openings. Even if not allot of black paint reached this area due to spray pattern on a particular car they were still used. The outline and effectiveness is illustrated in the picture below.
Do you have a need to discuss or see seam sealers and sound deadener patterns?


