Author Topic: 69 mach 1 blackout san jose  (Read 2168 times)

Offline cbrown

  • Silver Level Subscriber
  • Jr. Member
  • ****
  • Posts: 89
69 mach 1 blackout san jose
« on: April 10, 2018, 02:32:48 PM »
Can anyone help with guidance on proper procedure  OR link on site for blackout on 69 mach 1 san jose built?   I have print outs that show the outer stripe stopping before end of hood edge and cowl panel.  Was the cowl painted on the car?  how far did overspray go down on inside of cowl?   

Rather try to do correctly first time rather than redo.. any help appreciated

chris

Offline J_Speegle

  • Administrator
  • Hero Member
  • *****
  • Posts: 24247
Re: 69 mach 1 blackout san jose
« Reply #1 on: April 10, 2018, 05:23:05 PM »
Hood and cowl painted pinstriped on the car

Tiger stripe comment removed  ::)

Will see if we've already cover the striping around the edges of the black out. I not will post after I find and organize some
« Last Edit: April 13, 2018, 09:33:04 PM by J_Speegle »
Jeff Speegle

Anything worth doing is worth doing concours ;)

Offline cbrown

  • Silver Level Subscriber
  • Jr. Member
  • ****
  • Posts: 89
Re: 69 mach 1 blackout san jose
« Reply #2 on: April 10, 2018, 05:41:50 PM »
As always   thank you

chris

Offline rockhouse66

  • Hero Member
  • *****
  • Posts: 930
Re: 69 mach 1 blackout san jose
« Reply #3 on: April 11, 2018, 08:57:39 AM »
My 3/69 SJ Mach 1 had the stripes stop short of the edge of the hood at the cowl on both the hood and cowl side.
Jim
'66 GT FB

Offline cbrown

  • Silver Level Subscriber
  • Jr. Member
  • ****
  • Posts: 89
Re: 69 mach 1 blackout san jose
« Reply #4 on: April 11, 2018, 09:27:02 AM »
that is the way i laid mine out on hood and cowl last night.    Do you remember how far the blackout traveled down into the jamb?

chris

Offline J_Speegle

  • Administrator
  • Hero Member
  • *****
  • Posts: 24247
Re: 69 mach 1 blackout san jose
« Reply #5 on: April 11, 2018, 02:53:25 PM »
that is the way i laid mine out on hood and cowl last night.    Do you remember how far the blackout traveled down into the jamb?

chris

Stopping short of the rear gab between the hood and cowl is pretty typical of all plants and as instructed (what they wanted) from Ford


"traveled down into the jamb?' guess the "jamb is the cowl to hood gap?
Jeff Speegle

Anything worth doing is worth doing concours ;)

Offline cbrown

  • Silver Level Subscriber
  • Jr. Member
  • ****
  • Posts: 89
Re: 69 mach 1 blackout san jose
« Reply #6 on: April 11, 2018, 09:11:49 PM »
Yes,  I meant the gap between hood and cowl...

thank you

Offline J_Speegle

  • Administrator
  • Hero Member
  • *****
  • Posts: 24247
Re: 69 mach 1 blackout san jose
« Reply #7 on: April 11, 2018, 10:39:42 PM »
We never "talked" about when the car was built. Hopefully that does not have a great bearing on how things were done. At this point it doesn't appear to

Two original paint examples at least one of them was featured in an unrestored picture thread. I invite to search that out since it might help in some of the differences between San Jose and the other two plant production practices ;)

9R1359xx  a Jan built car


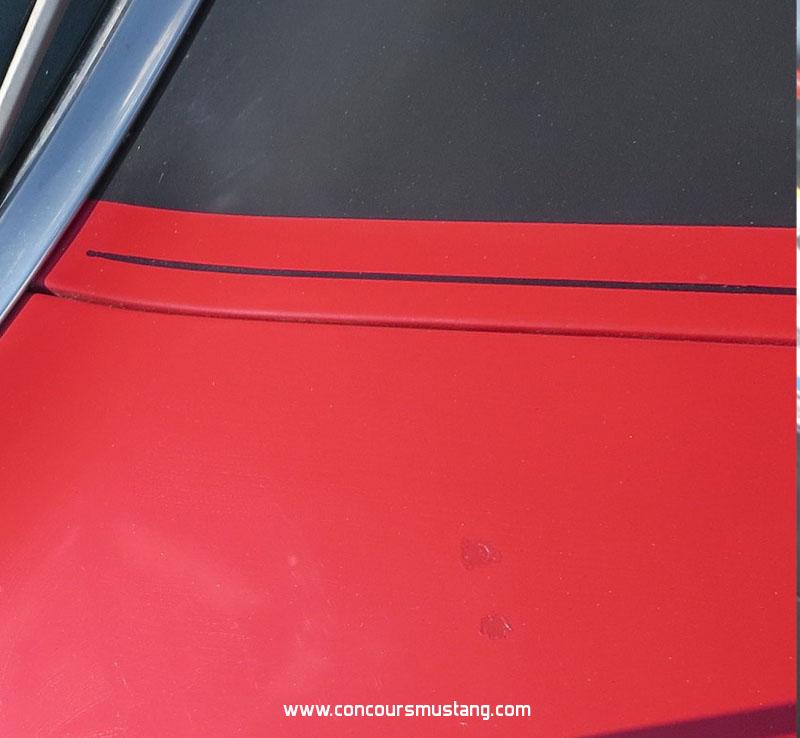
Notice how the outer stripe stops well before the windshield molding. Not something you see on the typical "restored" car
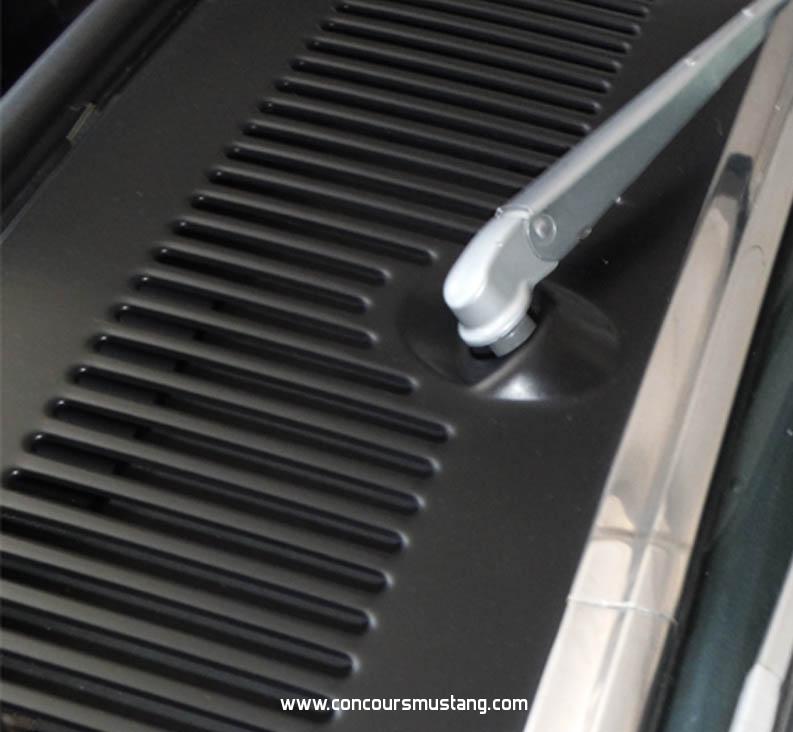


Wiper post


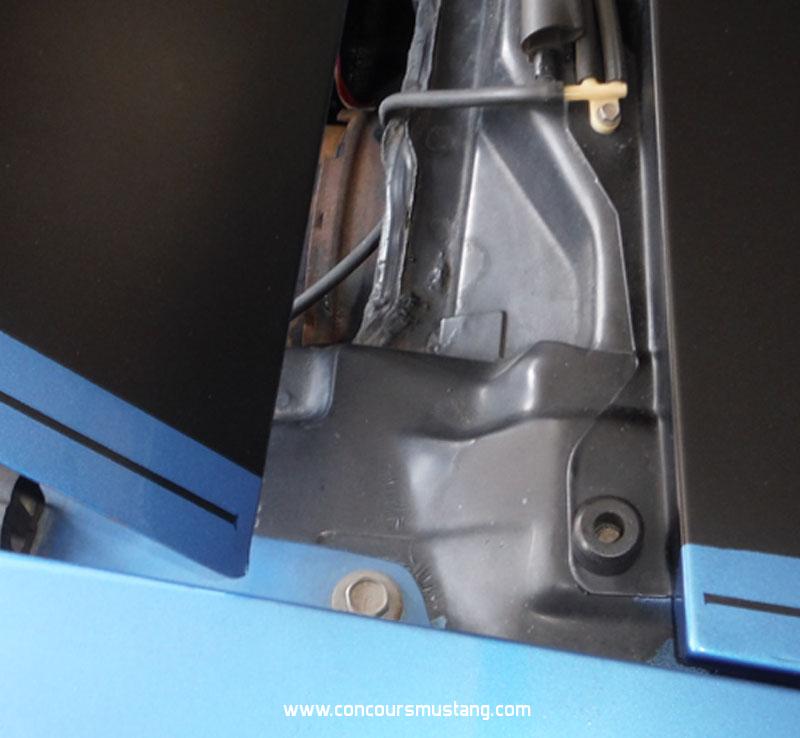
Cowl to hood opening


9R1705xx April built car

Again stripe stops well before the windshield  trim


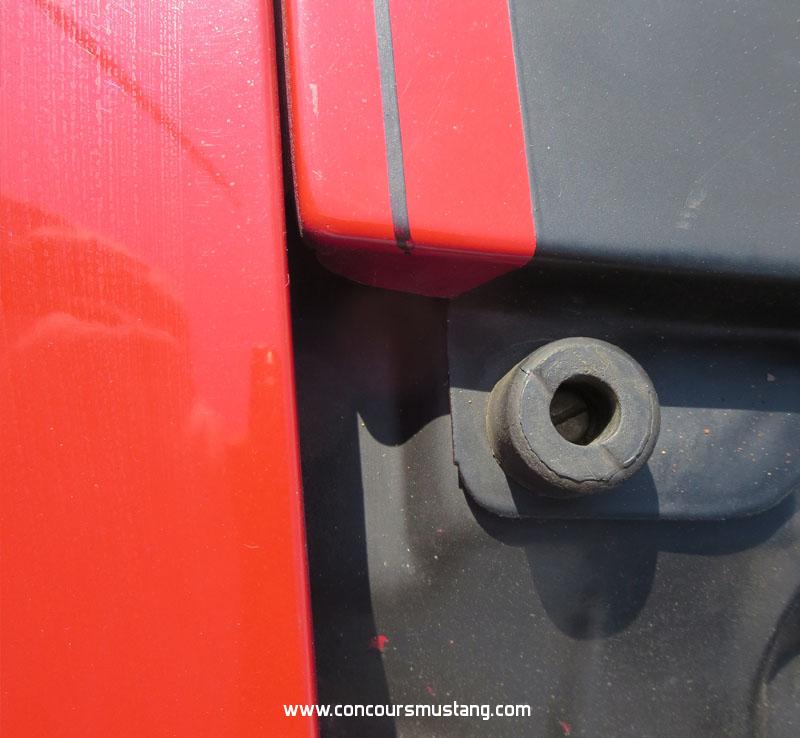
Looks like this time the worker went further to the edge. Does not look like he placed the tape barrier (which forms the slight T in most of those stripes at the very end) this time and free handed this one time. Example of the slight "T" finish detail can be seen in the third picture above of the blue example


And another angle


Hope this helps
Jeff Speegle

Anything worth doing is worth doing concours ;)

Offline Daven

  • Full Member
  • ***
  • Posts: 189
  • 1969 Mustang Mach I. 9R02R107xxx
Re: 69 mach 1 blackout san jose
« Reply #8 on: April 11, 2018, 11:40:34 PM »
It looks like the painters used the bottom metal tab of the cowl as the guide for how wide the blackout vs non blacked out area would be. 

Daven
9R02R107xxx

Offline PerkinsRestoration

  • Sr. Member
  • ****
  • Posts: 292
Re: 69 mach 1 blackout san jose
« Reply #9 on: April 13, 2018, 09:21:46 PM »
I believe the hood and cowl blackout  were painted off the car. The pin stripe was applied after the hood and cowl were fitted to the car. Notice in pictures the cowl black was applied prior to molding installation. I have not seen black zebra striping on underside of cowl or overspray on wiper parts on unrestored 69 cars . The reason the pin stripes end before edge is the moldings and hood were already installed. The jig that guided the stripping wheel was not the same as blackout template. Often the hood and cowl blackout does not line up on both sides ,however the pin stripes do line up well because they were applied after assembly. If you have a good example to observe you can notice the difference in black paint and overspray pattern between the removable cowl panel and the area below the cowl and see there is no way the cowl was pained on the car. My reference is Metuchen and Dearborn  Mach's and Boss's. I doubt San Jose was much different from pictures used as reference in earlier post.   


Offline J_Speegle

  • Administrator
  • Hero Member
  • *****
  • Posts: 24247
Re: 69 mach 1 blackout san jose
« Reply #10 on: April 13, 2018, 09:31:59 PM »
I believe the hood and cowl blackout  were painted off the car. The pin stripe was applied after the hood and cowl were fitted to the car. .......................

Bob thanks for the correction. I have altered/corrected my earlier response. Not sure why I wrote painted on the car rather than pinstriped.  ::)
Jeff Speegle

Anything worth doing is worth doing concours ;)

Offline cbrown

  • Silver Level Subscriber
  • Jr. Member
  • ****
  • Posts: 89
Re: 69 mach 1 blackout san jose
« Reply #11 on: April 13, 2018, 11:15:13 PM »
Thank you all for the perfect pictures!!!  I am doing tomorrow morning and shop .   I post on instagram for all you old guys  lol!!!!

thanks chris 

Offline Anghelrestorations

  • Hero Member
  • *****
  • Posts: 1129
    • Anghel Restorations
Re: 69 mach 1 blackout san jose
« Reply #12 on: April 14, 2018, 01:17:29 AM »
Good thread and good pictures.  Makes sense that the hood and cowl blackout was done off the car.  Cant see the completely finished car with drivetrain installed go back to the paint area to have the hood redone.  Would have wasted too much time....which means money....which is not something Ford wanted on the assembly line.   
Marcus Anghel
MCA National Gold Card Judge, 69-71 Mustang
SAAC National Head Judge, Boss Mustangs

www.anghelrestorations.com
www.facebook.com/anghelrestorations
www.instagram.com/anghelrestorations

Offline Daven

  • Full Member
  • ***
  • Posts: 189
  • 1969 Mustang Mach I. 9R02R107xxx
Re: 69 mach 1 blackout san jose
« Reply #13 on: April 15, 2018, 05:38:27 AM »
When looking at the pictures that Jeff and Bob posted, the unpainted area on the cowl panel must have been at a different width when you look closely at the bottom tab that the mounting screw goes through.

Daven
9R02R107xxx

Offline J_Speegle

  • Administrator
  • Hero Member
  • *****
  • Posts: 24247
Re: 69 mach 1 blackout san jose
« Reply #14 on: April 15, 2018, 05:59:10 AM »
When looking at the pictures that Jeff and Bob posted, the unpainted area on the cowl panel must have been at a different width when you look closely at the bottom tab that the mounting screw goes through.

The angle of the picture and the difference between the way San Jose masked that end compared to the late Dearborn way that Bob showed in his example may tend to produce a optical illusion.  The gab (short of measuring them in person) between the end of the cowl cover and the edge of the black out looks pretty close if you just compare those IMHO

Appears that San Jose ran the masking tape at an angle on the two examples I posted.  Will have to see how many other Dearborn examples I have that show that detail in my files. The other side on the example Bob posted looks different from the passenger side he posted the picture of so should look for some more examples for Dearborn owners and also just to see which side was more the nor for the plant but of course that is not the focus of this particular thread
« Last Edit: April 15, 2018, 06:20:30 AM by J_Speegle »
Jeff Speegle

Anything worth doing is worth doing concours ;)